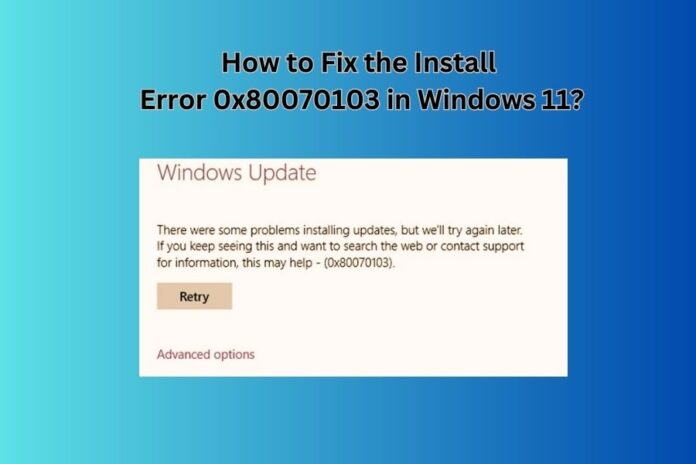
If you’ve encountered the dreaded Install Error 0x80070103 while trying to update your Windows 11 operating system, you’re not alone. This error can be frustrating, but fear not – in this guide, we’ll walk you through the top solutions to get your update process back on track.
What is Install Error 0x80070103?
The Install Error 0x80070103 is a common issue that occurs during the Windows 11 update process. It often appears when you’re trying to install an Intel driver update. This error usually indicates that the driver you’re trying to install is already present on your system or that a more suitable driver is already installed.
Understanding Error Code 0x80070103:
Error code 0x80070103 is a result of a driver conflict during the update process. Windows Update scans your system for available updates, but if it detects a driver that’s not entirely compatible with your hardware, it triggers this error to prevent potential issues.
Reasons of this Error:
- Existing Driver Version: Similar driver already present, triggering conflict detection.
- Driver Compatibility: Incompatible drivers with hardware or Windows 11 OS.
- Windows Update Database: Outdated or inaccurate driver information causing conflicts.
- Automatic Driver Installation: Overlapping manual and automatic driver installations.
- Device-Specific Issues: Unique compatibility problems for certain hardware.
- Incomplete Previous Updates: Interrupted or unfinished past driver installations.
- Software Interference: Third-party software, like security programs, blocking updates.
- Corrupted System Files: Damaged system files affecting driver installations.
- Network Issues: Poor connectivity leading to corrupted downloads or incomplete installs.
Top Solutions to Fix Install Error 0x80070103:
1. Hide the Problematic Update:
- Open the Windows Update settings.
- Click on “View update history.”
- Find the update associated with the error.
- Right-click on the update and select “Hide update.”
- This prevents the troublesome update from being installed until a suitable fix is available.
2. Manually Update Drivers:
- Visit the official website of your device’s manufacturer.
- Look for the latest drivers for your hardware.
- Download and install the appropriate driver manually.
- This ensures you have the correct and compatible driver for your system.
3. Uninstall Conflicting Drivers:
- Press Win + X and select “Device Manager.”
- Locate the device with the problematic driver.
- Right-click on the device and select “Uninstall device.”
- Reboot your computer and let Windows automatically install the suitable driver.
4. Use the Troubleshooter:
- Go to Settings > Update & Security > Troubleshoot.
- Run the “Additional troubleshooters” option.
- Select “Windows Update” and follow the on-screen instructions.
- The troubleshooter can automatically detect and resolve common update-related issues.
5. Restart the Windows Update Service
- Simultaneously press the Windows key and the “R” key on your keyboard. This will open the Run dialog box.
- In the Run dialog box, type “services.msc” (without the quotes) and hit Enter. This action will open the Services window.
- In the Services window, scroll down to find “Windows Update” from the list of services.
- Right-click on “Windows Update” and select “Restart” from the context menu. This will initiate the restart of the Windows Update service.
- Once the service restarts, go back to the Windows Update settings and check for updates again. This fresh start might resolve the Install Error 0x80070103.
- If the update that previously triggered the error is available again, try installing it. With the Windows Update service restarted, the installation process might proceed without any issues.
6. Run SFC and DISM
Running the System File Checker (SFC) and Deployment Imaging Service and Management Tool (DISM) are advanced yet effective steps to tackle the Install Error 0x80070103 on Windows 11. These tools help identify and repair system file corruption and component issues that might be causing the error. Here’s how to do it:
Running SFC (System File Checker):
- Start Command Prompt and choose “Run as administrator.”
- Enter the following command and press Enter:

This command will initiate the System File Checker scan. It will scan and repair any corrupted or missing system files.
- The scan might take some time to complete. Let it run without interruption. Once done, you’ll receive a message indicating whether any issues were found and repaired.
Running DISM (Deployment Imaging Service and Management Tool):
- Open Command Prompt as an administrator.
- Type the following command and press Enter:

This command will initiate the DISM scan, which checks for component corruption and attempts to repair it.
- Similar to the SFC scan, the DISM scan might take some time. Allow it to complete, and avoid interrupting the process.
- Once both scans are complete, restart your computer to apply any repairs made during the scans.
Running SFC and DISM scans can help address underlying system issues that may be contributing to the Install Error 0x80070103.
Conclusion:
Facing the Install Error 0x80070103 on Windows 11 can be a bit of a headache. But worry not! These solutions are like handy tools in your toolkit.
Whether you decide to hide that pesky update, update drivers yourself, or let troubleshooting tools do their magic, these steps are here to make sure your system update goes off without a hitch.
Your Windows 11 will be up to speed before you know it, without all the usual fuss.


![Avast Driver Updater Key 2022 | Activation Key V2.5.9 [Free]- Avast Driver Updater Key 2021](https://vintank.com/wp-content/uploads/2021/02/Avast-Driver-Updater-Key-2021-100x70.jpg)
![Avast Premier Activation Code and License Key [Working] Avast Premier Activation Code and License Key](https://vintank.com/wp-content/uploads/2021/09/Avast-Premier-Activation-Code-and-License-Key-100x70.jpg)
